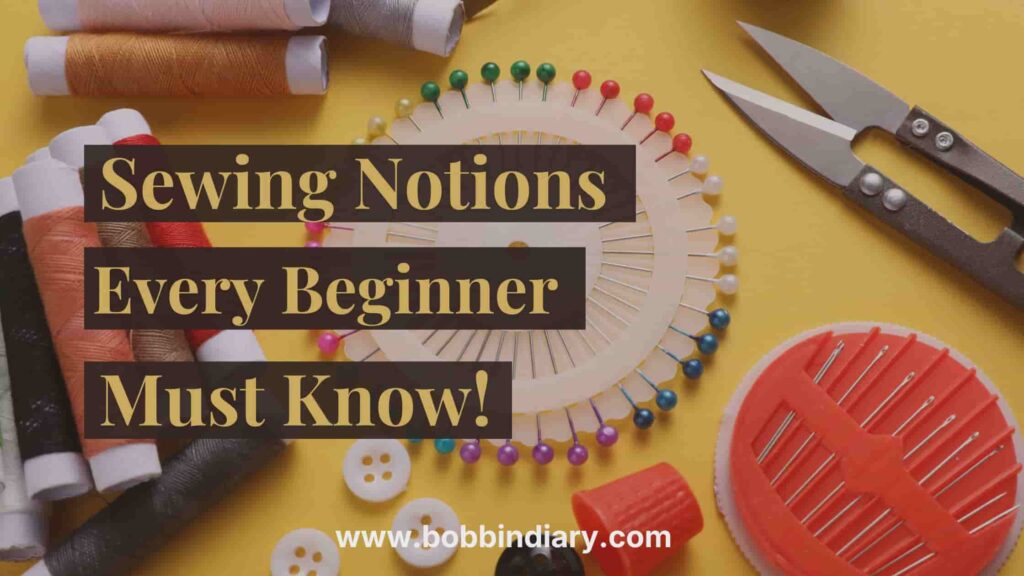
I was 8 when my parents gifted me my first sewing kit. It was a hand-sewing needle kit with a cute little yellow flower-shaped case! I still have that kit with me. It included a set of threads, various needles, tape, fasteners, and a pin cushion.

I guess you might have a similar kind of kit at home for mending clothes. Today, we will learn all about sewing notions everyone must have for sewing clothes!
You may call them sewing tools, supplies, accessories, or necessities- all are the same helping hands for a sewing project.
What Are Sewing Notions:

Sewing notions are tools that help us while making garments. They are useful for overall steps, such as measuring, cutting patterns, pinning, etc.
Historical Journey Of Sewing Notions:
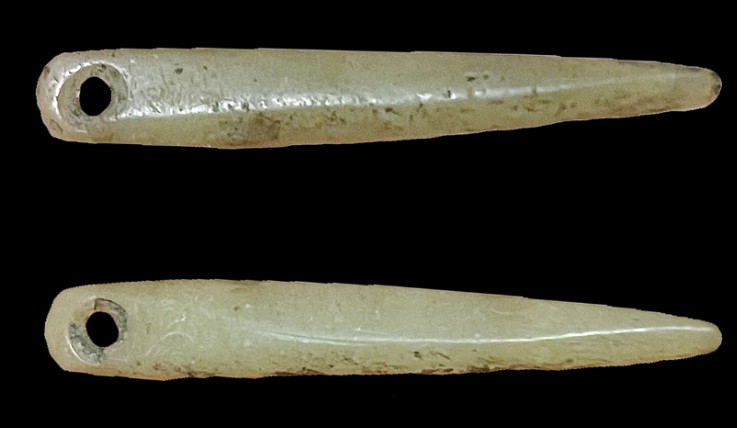
Have you wondered why these humans made such needles?
This story started in the prehistoric era! Early humans made needles from bones and ivory.
They needed tools that could pierce through tough fabrics to sew durable clothes and shelter covers.

This journey started 25000 years ago. Paleolithic humans used natural fibres, bone needles, and sinew to sew furs and skins.
Before eyed needles were used, they sewed pieces of animal skin with this perforated bone. Animal skin was placed on such bones and struck with a burin. Around 100 AD, the Romans made pivoting scissors.
During the Crusades, the use of buttons and buttonholes became popular in Europe (in the Middle Ages).

In the 18th and 19th centuries, the Industrial Era saw an immense development of sewing notions. People started using cotton threads to stitch clothes. They also utilized standardized methods to make pins and needles.
Along with this, they used ribbon/ fabric measuring tapes, hooks, eyes, zippers, etc., for sewing clothes. Many people started taking patents for these inventions.
Many eras passed, and sewing also evolved with us. Humans crafted various sewing notions, such as needles, bone awls, thimbles, etc. Thanks to our creative minds!
Let Us Learn All Sewing Tools:
1. Measuring Tools:
1.1. Measuring Tape:
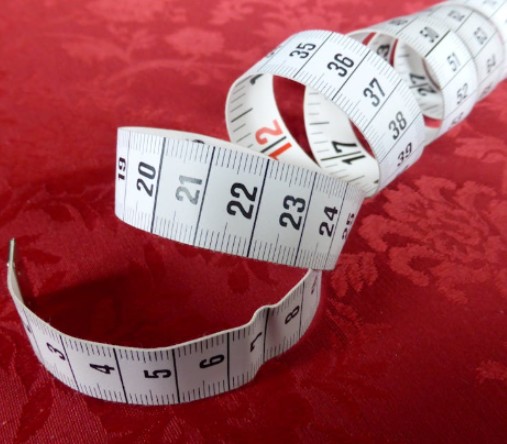
Everyone’s mom and grandma compulsively have this tool at home. What’s the use of sewing without measurement? Right?
You may know it as the ‘tailor’s tape’. They are available in imperial (inches) and metric (centimeters) units.
These 60 to 120-inch-long tapes can bend easily around curves. So, we can get accurate body measurements for proper fittings.
My Go-to Hacks:
I always share these key points with beginner students:
- Always keep your measuring tape parallel to the ground to get the right circumference measurements.
- For curved areas, measure around the fullest part. E.g., bust, arms, thighs, etc.
- Wear undergarments beneath clothes and breathe in fully- it gives a proper finish. Otherwise, you will end up sewing tight clothes.
1.2. Seam Gauge:
This 6-inch (0 to 15 cm ) long tape is mainly used to measure short distances on fabric.

I Mainly Use Seam Gauge For:
- Marking buttonholes at equal distances
- Marking intervals between pleats
- Marking hems and seams, especially in narrow areas
- Marking arcs and parallel lines for tucks, decorative pleats, etc.
- Marking custom widths.
This tool is very useful for beginners due to its sliders. You can take accurate measurements by moving and locking the slider.
It is very handy, lightweight, and durable. Thanks to its aluminum core.
2. Marking Tool:

Fabric marking pencils and chalks are a perfect solution to mark measurements before cutting the pattern. You can mark temporary lines using these tools.
They leave a very light marking on the fabric. So, you can stitch without smudging the fabric.
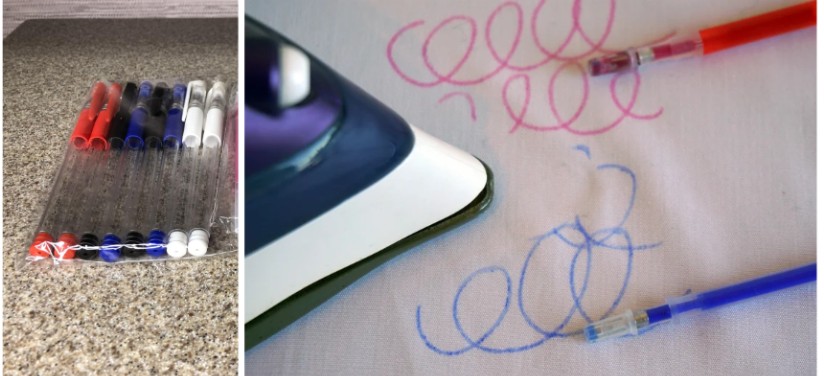
I sometimes use a heat-erasable fabric pen too. Its grip is way more comfy than fabric chalks. I really love its glittery, smooth finish for marked lines.
And, the best part is that the ink disappears after you iron the fabric.
3. Cutting Tools:
3.1. Scissors:
They say, ‘never use your tailor’s scissors to cut things other than fabric.’
These scissors are specifically designed for cutting fabric and threads.
I Use These Scissors In My Daily Cutting Tasks In Sewing:
1. Tailoring Scissors:

These 7-10-inch-long scissors have angled blades. They also have an asymmetrical handle for a proper grip.

These scissors are also called ‘dressmaking shears’. We can cut long or thick fabric in straight lines without fraying using these scissors.
2. Zig-zag Blade Scissors:

Have you seen those decorative zigzag edges on leather outfits, linen fabric edges, or denim pockets? It is done using these shears.
They are also called ‘pinking shears’. They have a zig-zag-shaped blade edge. It looks similar to a saw-toothed blade.
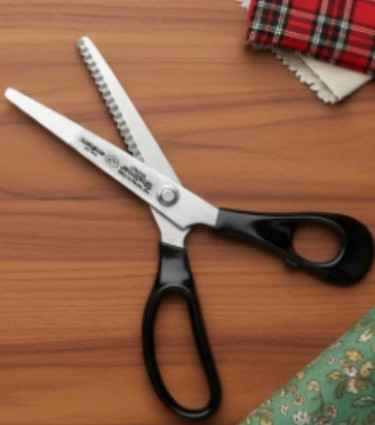
I really like these scissors because they limit the frayed thread ends. This reduces the damage to the fabric’s edges.
You can use them to trim seam allowances while finishing seams. I mostly use these shears to trim cotton, flannel, linen, silk, denim, leather, and wool.
3. Embroidery Scissors:

These scissors are mainly used to cut threads in embroidery work.
They are smaller than regular dressmaking scissors. Their 3 to 4-inch length allows us to cut threads neatly without damaging the embroidery pattern.
Their pointy tips are good for snipping jump stitches and tiny threadwork.
4. Thread Snips:
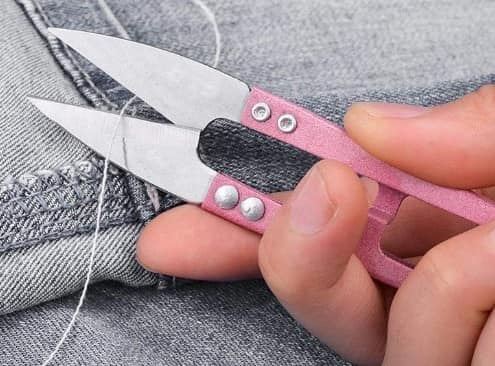
These are spring-loaded cutting tools. They are mainly used to cut threads, yarns, and embroidery threads.
These snips have one-handed operation. I find it way easier than handling two-finger loop regular scissors.
You just have to squeeze in their handles and cut the thread. After each squeeze, they autonomously open. This movement gives me less strain on my hand muscles. So I can cut threads continuously without getting tired.
If you have hanging threads or frayed ends, these snips work best on them!
3.2. Rotary Cutter:
It works like a pizza cutter!
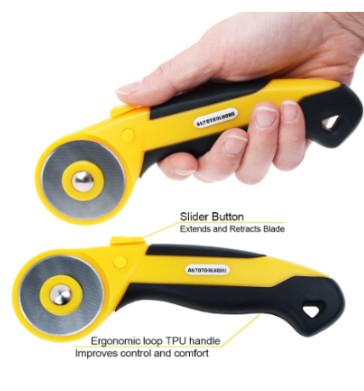
It has a circular blade that can cut through many layers of fabric without damaging them.
The best thing about this cutter is that both left and right-handed tailors can use it. Thanks to its ergonomic handle grip!
This cutter is razor sharp. Hence, I suggest using it with a self-healing mat and an acrylic ruler for safety.

I use a 28 mm blade size for cutting tight curves and a 45mm rotary cutter for general cutting tasks.
If you need to cut many layers, a 60mm cut works best. Always cover the blade whenever not in use. This habit helps keep your rotary cutter blade sharp for longer.
3.3. Seam Ripper:
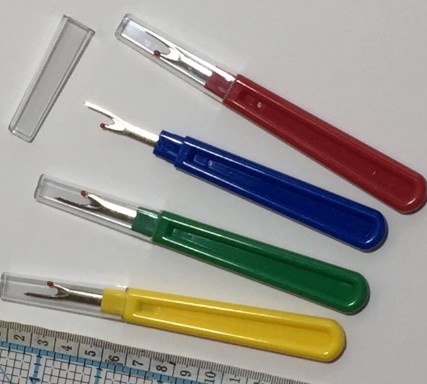
As the name says, this tool rips off seams without damaging the fabric! It is used to fix mismatched stitches.
You need to put the pointed tip of the seam ripper under the stitch thread and cut it using the inner ‘J’ shaped curve blade.
My Pro Tip: The small red ball at the tip of its curve should always face down when you cut the stitches.
And, for ripping stitches quickly: cut 3-4 stitches at a few intervals and pull the thread. It will come out smoothly.
4. Pinning Tools:
4.1. Pins:

Sewing pins hold the fabric layers before final stitching. They are great for holding pleats and multiple pieces of fabric in one place.
Here are the types of pins that I use in my daily sewing tasks:

4.2. Pin cushions:
A pin cushion comes in three main types:
1. Foam Cushion:
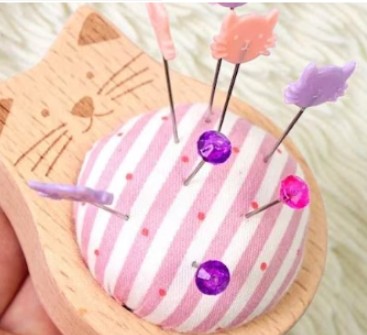
This cushion looks like a small circular or square foam pillow. You can pierce the pins in these cushions whenever you are not using them.
2. Magnetic Cushion:

It has a small magnetic plate on which you can stick pins. I can gather scattered sewing pins on the desk using it.
3. Wrist Pin Cushion:

It can be a foam or magnetic cushion. It is fixed on a wristband that you can easily wear while working on the fabrics
5. Fasteners:
Want to do donning, doffing, or closing in the outfit? What will you need? FASTERNERS.
Yes, hooks, buttons, etc., fasteners connect two fabric pieces for a perfect fit. Let us see each of them below:
5.1. Buttons:

We attach these buttons at the centre front of the blouses, skirts, pants, trousers, etc. They secure the garment’s opening. They need to pass through the buttonhole to secure the cloth.
They are sometimes used for decorative purposes, too! You can find such embellishments on soft toys, accessories, etc.

Shank buttons have a hollow protrusion on the back. Thick fabrics like wool, leather, jute, denim, etc., can fit beneath them.
5.2. Zippers:

They secure closures on skirts, jeans, trousers, t-shirts, jackets, etc. These notions connect the edges of two fabrics via metal teeth.
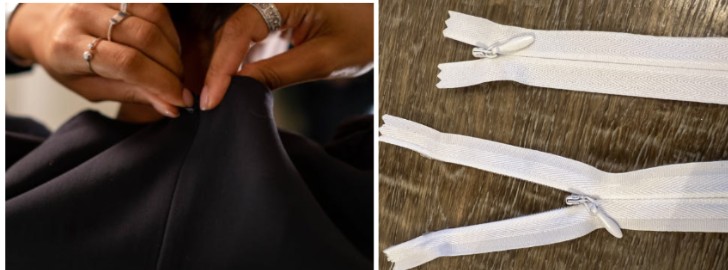
Invisible zippers are hidden within a seam, giving a clean look. You can find them on the side or back of dresses, skirts, etc.
5.3. Hooks And Eyes:
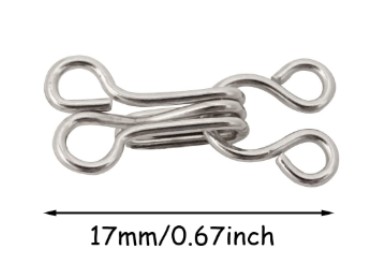
You will find these hooks and eyes at the edge of the jeans, waistbands, tops, trousers, etc. These fasteners are strong enough to hold more tension.
They safeguard low-bulk closures on clothes. Round eyes hold two fabrics that meet at the edges. However, a straight eye-hook is good when two fabrics overlap at the edges.
5.4. Velcro:
It quickly binds two pieces of fabric together. It has two parts: a rough hook and a smooth loop.
The rough hook connects to the soft loop after we press them.
6. Stitching Tools:
6.1 Threads:
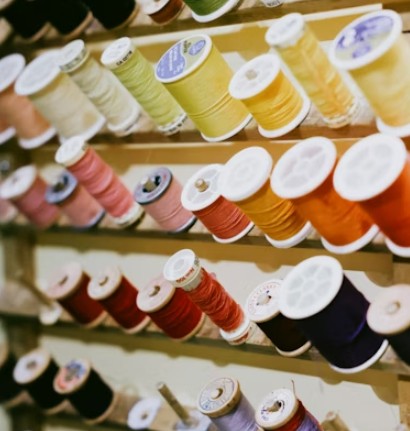
Sewing machine threads are made to withstand heat, tension, and friction.
Their multi-yarn feature stays strong during fast sewing. I like to use all-purpose polyester threads for general use. You can also use cotton, rayon, or polyester threads, depending on the fabric and the stitches.
For high-speed stitching, serger/overlocker threads are good. They have comparatively higher strength.
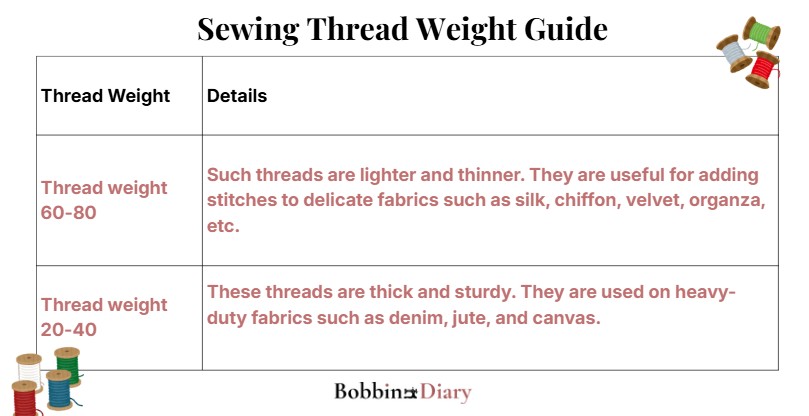
Thread Weight
Thread weight plays a major role when you sew different types of fabrics. Here is how you can choose the right thread weight:
Monofilament Thread:
Sometimes, monofilament threads are also used to add invisible stitches to the fabric. They are mostly used in quilting, upholstery, appliqué, bind-hemming, etc.

Pro tip: Monofilament threads run tighter than regular serger threads. So, keep the thread tension lower than regular.
6.2. Bobbins:
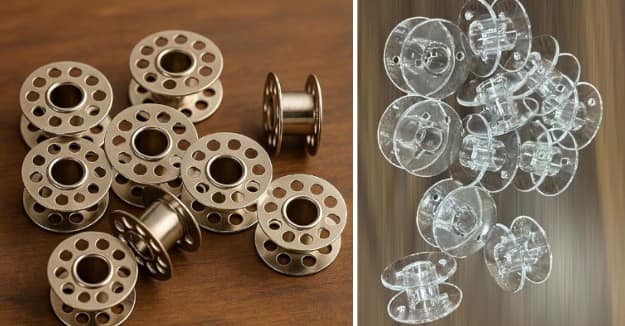
It’s a small spool where we wind the bobbin thread. It’s also known as ‘spindle’ or ‘cylinder’. It is a bottom thread to create backstitches.
Bobbins can be made from metal or plastic. I personally like metal bobbins as they are more durable and can sustain high-speed stitching.
They must be set into a bobbin case for proper stitching. Bobbin cases can be standard-sized or size-adjustable.
7. Other Essential Notions:
7.1. Sewing Clips:

These clips are a great alternative to pins. They are tiny plastic clips with a metal spring and a flat shape.
Pins usually make holes in the fabric. But these clips can comfortably hold the fabric together without damaging it. Plus, they can hold two or more layers of fabric together very firmly.
Sometimes, I poke my fingers when using pins. But that’s not the case for clips. No poking, no pain!
Important tip: Make sure you remove each clip when it reaches near the pressor foot.
7.2. Thimble:
Want to save yourself from sharp pricks? A thimble can help you!
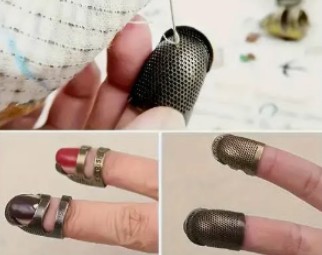
A thimble is a metallic, leather, or plastic cap worn on a finger while hand-sewing. You can easily push needles through layers of fabric after wearing it.
Its pitted surface adds grip. You can easily guide the needle through the fabrics without slipping.
These thimbles come in various sizes, such as 4, 8, 9, etc.
7.3 Bias Tape:
Have you observed the edge of a quilt, bib, or mat? They all have bias tape sewn at the border.
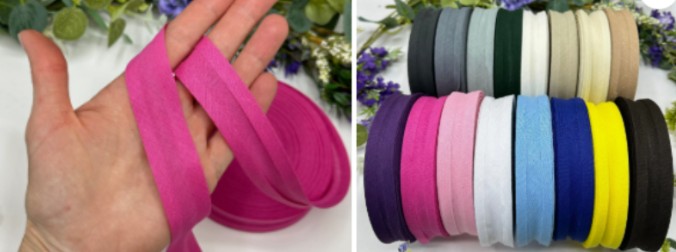
This tape is mainly used for piping, binding seams, and creating facings. They are a great alternative to French seams, hem tapes, and pinking shears.
You can use single-fold bias tapes for two folds. You can locate it inside the garment. However, for three or more folds, use double-folded bias tape. This tape is visible outside the garment over the edges.
7.4 Loop Turner:
Want to make tiny straps on dresses or small belt loops at the waistline? A Loop turner helps you the best for this!
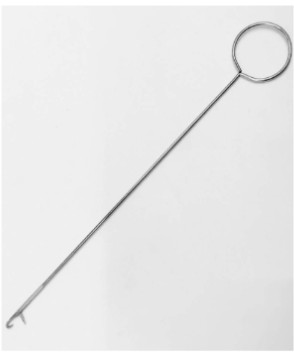
Loop turners help to turn narrow fabric tubes. You can make small spaghetti straps, belt hooks, and button loops on the garment using these tools.
Just slide the hook of the loop turner through the tube. Keep the fabric end attached to the hook. Gently pull it backwards. It reverses the tube easily.
My Two Cents:
Sewing notions are as important as a sewing machine. Without them, any sewing project is incomplete.
Whether it is a thimble, bobbin, threads, or tapes, each tool plays a major role in sewing garments.
These tools are like the holy grail of the sewing universe! If you are a beginner, you must know these sewing tools and how to use them. I hope this guide has given you a detailed idea about them.
So, keep practicing these tools in your stitching projects! soon, you will handle them like a pro. If you need more help, mail me. I’d love to help you!
FAQs:
1. What Are The Tools Used In Sewing?
Sewing garments requires various tools like scissors, chalks, pins, pin cushions, an iron, an ironing board, fasteners, etc.
2. What Is Difference Between Shears And Scissors In Sewing?
Both are used for cutting purposes. But, fabric shears have a bent handle. Their lower blade to lie flat on the surface. So, even and sharp cutting happens. However, scissors have equal handles. They are mainly used for cutting paper, threads, etc.