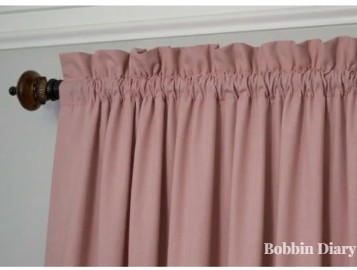
Who doesn’t love a good-looking home? Decorating with simple things like a set of wavy curtains adds a homely feel to your living space, right? Last year, we redecorated our living room.
But Harish forgot to buy curtains for a window. Instead of buying them separately, I decided to stitch them at home! And, this is how our living room looked after adding these beautiful self-stitched curtains!:

You know what the simplest thing I started with in my learning days? It was learning how to sew a curtain. Many people find it so tricky.
Believe me, it’s not! TBH- It feels pretty simple. You only have to stitch straight fabric panels together, sew hems, and attach curtain hooks to them.
So, if you need the detailed guide on making curtains, let me take you through this article.
How To Sew A Curtain?: 5 Easy Steps
Supplies You Need:
Most of these things are handy and easily available in local shops. Here is the list of essentials needed to sew curtains:
- Iron
- Pins
- Thread: matching or contrasting, anyone would work- depends on your choice!
- Needle
- Fabric
- Scissors
- Curtain rod
- Measuring tape: Metal tape is preferred. I used CRAFTSMAN 25-Ft measuring tape.
- Sewing chalks
- Sewing machine: (You can do it with hand sewing too, but it will take more time)
Step 1: Measure Your Window or Frame Where Your Curtain Will Go
Let’s say you are making a curtain for a window in your home. You need to plan first before measuring curtains.
Also, decide where your curtain rod will fit. Accordingly, the height of your curtain will be determined.
Step 2: Measure The Fabric Needed
Measure the curtain fabric according to your window’s measurements. I always iron fabric before measuring it. I make sure there are no wrinkles and folds.
For measuring:
- Lay your fabric flat on the surface. Open all its corners.
- Measure the width of your window. Decide how many panels you need for that width.
Pro tip: I took 2 times as wide fabric as my window. That’s why the curtain won’t look like a flat sheet. And, it fully covers the window.
E.g Let’s assume your window is 4 ft long. So, you can measure an 8 ft panel or cut 2 4 ft panels.
- Measure the length from the top, where the iron rod fits, to the bottom of the floor.
Don’t forget this dummy mistake: Many beginners ignore it and end up cutting shorter curtain panels. Always measure the curtain rod pocket and hem length.
Let’s assume you need a 100-inch curtain panel.
And, if your rod pocket is 4 inches, the hem is 3 inches.
So, you will cut: 100 + 4 + 3 = 107-inch panel.
Step 3: Cut the Panels✂️

Mark the curtain according to the measured length and width. And, use a sharp pair of scissors to cut the fabric gently.
Tip: if you want thicker curtains, you can add plain white cotton/ linen fabric from behind the main panels.
Avoid pulling the fabric while cutting to avoid improper cuts.
Step 4: Iron and Pin Seams🧷
If you are a beginner, baste the curtains first. DO NOT SKIP THIS STEP. Because it offers smooth and straight edges.

So, mark the seam on the curtain. Iron the seam lines. And pin them using sewing pins. I am now so used to this process that I don’t use pins. I have just shown the image for your reference.
You can use safety pins or needles to keep the fabric in place, too. You can pull the pins out as you sew.
Step 5: It’s Sewing Time!- Sew Sides First, then Top, and Last Hems
So, a lot of fabric frays once we start using curtains. To avoid that, we must hem the borders.
As a beginner, you may not understand what a hem is. Don’t worry. It is a process of concealing fabric borders in three easy steps:
- Fold the ragged edge
- Fold it again
- Sew the folded side.
Done!

For this curtain, I started with sewing the sides first. Then I sewed the top head, and lastly I sewed the hems.
Secret tip: I prefer backstitch for sewing curtains. So, the stitches lock, and the curtain doesn’t fall apart later after hanging.
1. Sides:
Many loose threads are seen after cutting the curtain fabric. So, to hide these threads, we must sew the sides first.
You can skip sewing the sides if the fabric is thick. But it looks raw/unaesthetic. And the fabric edges start to lose threads over time. So, it’s better to sew them
2. Top:
When I sew curtains at home, I choose from these two methods:
- Rod pocket method
- Curtain tape and hook method:
2.1. Rod Pocket Method:
Now you may ask: ‘What’s a rod pocket?’
It’s a tunnel of fabric to pass the curtain rod. But, I like the ROD POCKET METHOD the most. Because it’s easy and beginner-friendly.
Important: The rod tunnel must be larger than the rod.
So, if your rod is 4 inches thick, sew the rod pocket with 4 ½ or 5 inches of thickness. This gap allows us to slide the curtain smoothly.
If you don’t want a rod pocket, you can also add a curtain pleating tape at the top.
2.2. Using The Curtain Pleating Tape:

I use curtain hooks and pleating tape frequently.
Cut an equal amount of pleating tape according to the curtain’s width. Put it on the top border of the curtain panel. And, sew it using a matching thread.
After stitching the tape inside the curtain, simply pull the strings of the tape. In this way, the fabric bunches up perfectly.
You can later insert hooks in this tape and hand it on the rod.
I believe the hooks are reliable and hold the curtain firmly. But, over the period, the pleating tape gets loose or has loose threads whenever we pull out and insert hooks.
That’s why I prefer the pocket rod method.
3. Sewing Bottom Part:
Many beginners make this mistake. They rely on the measurements when they lay out the fabric on the floor.
But we forget about gravity! Sounds funny, right? It’s true. After hanging the curtain panel, the fabric gets stretched. It looks uneven on the edges.
So for perfect bottom hems, I do this:
After sewing the rod pocket, I hang the curtain on the rod. In this way, I get a basic idea about how it will look and how much length is needed.
Now, locate the line where the curtain panel touches the floor. You have to pin this bottom edge using bobby pins. This assures that your curtains are not too short or too long.
Then, take the curtain down from the rod. Lay it flat on the ground. And, mark a line where the bobby pins are attached.
Now, press this edge to get a flat edge of the button. I usually ‘double fold’ the bottom hem. It gives a premium appeal to the curtain panel.
My Secret hack:
If you find these hemming techniques difficult, try using fusible fabric tape. It’s a no-sew and DIY option for beginners. Frankly, I used iron-on hem tapes too when I was learning.
Just put on the iron tape at the bottom of the curtain. Fold it under the bottom edge. And, iron the border. Your hemming is done.
You can even double-fold the hem to make it look heavy and elegant. While double-folding, if I have a 6-inch edge. I fold a 3-inch first, and then fold a 3-inch for the second time. I use this trick for thin, lightweight fabrics such as cotton, polyester, silk, etc.
Step 6: Iron Them
Yes, after following all of the above steps, you have sewn your curtains! Now it’s time to enhance their look.
Lay them on a flat surface and iron them for a final touch. Ironing removes small wrinkles, fabric lines, and folds.
My Top 3 Top Tips For Sewing Curtains:
Matching Thread Magic:
Try sewing fabric with a matching thread color. It looks elegant, and all seams become almost invisible.
Prefer Long Stitches:
Using a slightly longer stitch of around 3mm is better for such long panels. You can put smaller stitches, but it can take longer ones.
Making Your Curtains:
You can also add a polyester fabric panel at the back of your main fabric. It adds insulation.
Or else, you can sew a lining of fabric at the top of the main fabric. And, let it hang freely at the bottom. You can tie it when you feel warm. You can open it and let it hang in cold weather.
Plus, in rainy weather, the linen or polyester will not absorb water like cotton does. It protects the main fabric from wetting, growing mold, and water spotting.(yellow spots that occur when a cotton fabric dries)
My Two Cents:
I hope you have understood all the steps that I have explained in this guide of ‘how to sew curtains?’ Making curtains at your home is very easy. For me, the rod pocket curtain making is much easier and reliable.
On the other hand, you can also opt for the ‘curtain pleating tape and hook method. You can always vouch for white hooks and tape. White is classy and goes with all colors.
Measure the panels correctly, sew sides first, and then go for the top side. After making a rod pocket or adding tape, hang them, locate the bottom edge, and hem it neatly. That’s it!
If you need more help in sewing curtains at home, send me an email of your query. I would love to help you!
FAQs:
1. Is Cotton Fabric Good For Sewing Curtains?
Yes. It offers ample ventilation, straps dust particles from outside, and also gives a beautiful sheer effect. It’s hypoallergenic and eco-friendly too. You can definitely sew curtains from this fabric. Always wash and iron this fabric before sewing to get proper measurements. But, make sure it doesn’t get wet. Otherwise, it will have dried spots of water and even may grow mold.
2. What Kind Of Fabric Can You Use For Curtains?
You can sew curtains of any fabric of your choice. You can use cotton, linen, polyester, velvet, silk, viscose, rayon, etc., fabric. I have seen some DIY projects where the sewer has made custom curtains from double/ twin/ twin XL bedsheets.
3. How Wide A Curtain Should Be?
A curtain panel should be two to three times wide the length of the curtain rod.