I was facing some issues in the third trimester when I was expecting Riya (my first child). My doctor told me to take a rest from all major activities, including sewing. But I started to feel lonelier without it. Now, what if I tell you that cross-stitch and my pregnancy share a deep bond?♥️
One day, I was speaking with my mom about it. She asked me, ‘Why don’t you try embroidery?’ I learned this art when I was 16. And it was left behind in all those years. Harish (my hubby) brought an embroidery kit from the nearest Walmart.
The very first practice I did was all the stitches and one-line patterns. And, one of them was ‘Cross-stitch.’ Why did I do that? It was pretty basic and could be used in various intricate designs.
After that, I started making new designs in my spare time. It was totally worth it! If you also want to learn ‘How to cross-stitch?’ I can help you. I have explained the two easiest methods to do this stitch quickly! : Danish and Traditional.
So, if you are a beginner or someone who wants to learn embroidery as a hobby, this stitch guide is for you. Keep reading ahead!
How to Cross Stitch?

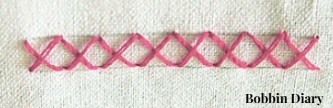
As the name says, this stitch looks like a ‘cross’. It’s a counter-thread embroidery showing a row of stitches in an X shape.
Such stitches give a tile-like or raster-like effect. They look uniform and equally aligned. Let us learn how to do cross-stitch in:
- Traditional way
- Danish way
Supplies You Will Need To Do Cross Stitch:

1. Embroidery hoop: Any hoop of suitable size (5, 6, 8, etc. inches)
2. Thread/ Embroidery floss: a good quality thread between 5 and 12. I prefer size 8 thread because of its ideal thickness.
3. Fabric: choose Aida, canvas, or any plain fabric you want to practice on.
4. Needle: They come in sizes from 1 (biggest) to 12 (smallest).
5. Scissor: to cut threads
6. Screwdriver: to tighten the hoop
Using the Traditional Method:
This is easier and more secure than the Danish method. In this method, you have to do one cross at a time. So, these stitches remain isolated. This method is useful for making horizontal, vertical, angled, and curved cross-stitches.
When viewed from a distance, these stitches look like pixel art!

So, here is how to cross-stitch using the traditional method:
Step 1:
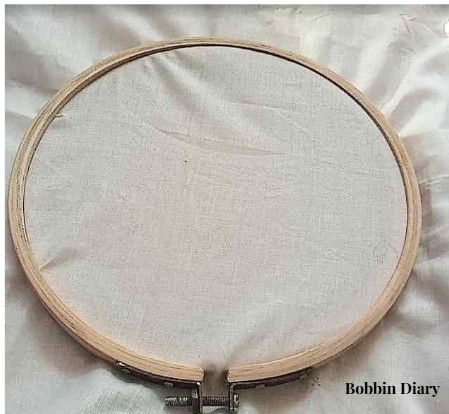
Set the fabric in the embroidery hoop. Thread the suitable needle with a thick floss. If you are a beginner, I suggest using thick threads for easy stitching.

Position the needle at point A. This is our starting point.
Pass it through A and move it diagonally across to point B.
Bring it back again, pass it through point C. Here, this point is horizontally parallel to point A.

Step 2:
After point C, pass the needle diagonally through point D. It is positioned vertically below A.
This is how you do a single cross stitch.

Step 3:

Now, we have to repeat the same process.
After point D, pass the needle from B to bring it upwards.
From B, pass the needle through point E.
Bring it outwards through point D in the reverse direction.
Step 4:

From D, pass the needle in through F. This completes our second cross.
Next, pass the needle out through the point E. In this way, we can make further cross stitches too.

Using the Danish Method:
In this method, we have to do the first row of diagonal stitches. We have to stitch crosses in reverse. This method is faster as it can do bulk stitches in a shorter period.

Let’s say you are making embroidery on a Christmas hoodie or sweater. Follow this method to make horizontal rows.
Step 1:

Mark a starting point and an ending point on the fabric.
First, pass the needle from C to D to make one diagonal stitch. Bring the needle to B from back to front. And pass it to the next D to make a second diagonal stitch.
Step 2:

Now we have to reverse the process from the endpoint to the starting point.
Again, make diagonal stitches, but in reverse to complete the loop.
That’s it! Done!
My Top Tips For Perfect Cross Stitching:
1. Equal stitches:
Yes, aesthetics matter a lot here! I always tell my students to keep all stitch lengths the same for cross-stitching patterns. It gives a surreal and good look.
2. Right needles:
Beginners may use long and thick needles initially. I use size 24 or 26 tapestry needles (I really love their blunt ends). These needles penetrate the fabric without breaking the stitch threads. So, your stitch design remains the same.
3. Practice & Patience:
Yes. This is very important. It took me many days to master this skill. As a beginner, you may not get welll aligned or equal cross sticthes.
To overcome this, first mark the areas where you will be adding cross stitches using chalk or pencils. Mark A, B, C, D, E, F, etc., points at equal distances. With continous practice, you may not even need marking later.
Key Takeaways:
Cross-stitching is easy. All you need is PRACTICE AND CONSISTENCY!
Initially, you may face challenges in getting equal stitches or using the right threads. Let me tell you, it’s totally alright. You will get there slowly and steadily as I did!
If you are a beginner, use printed stitch patterns for ease of understanding. Follow the simple steps given above in the two methods: Danish and traditional. Both ways are useful for making horizontal and vertical stitches.
Try using different thread strands with different needles. Experiment and analyse! I bet you will quickly learn to get perfect stitches!!
If you need more help with cross-stitch, I am happy to guide! Just send me an email with your query!
FAQs:
1. What Is A Stamped Cross-stitch?
In this method, a cross-stitch pattern with symbols for suitable thread colors is pre-printed directly onto the fabric. It is beginner-friendly and easy to follow. This method is very suitable for beginners and sewing learners.

2. What Is A Counted Cross-stitch?
In this method, plain linen or Aida fabric is used. Stitcher counts the threads or holes to make each cross stitch. It offers more freedom for choosing fabric types, hole counts, thread colors, and design positions.